Mums, short for chrysanthemums, are vibrant flowering plants that bring a burst of color to gardens in the fall. Revered for their wide variety of colors, shapes, and sizes, mum plants are a favorite among gardeners seeking to extend bloom time beyond summer. Native to Asia and northeastern Europe, mums are hardy perennials that can thrive with the right care.
This comprehensive guide will take you through everything you need to know about growing and caring for mum plants.
Understanding Mum Plants
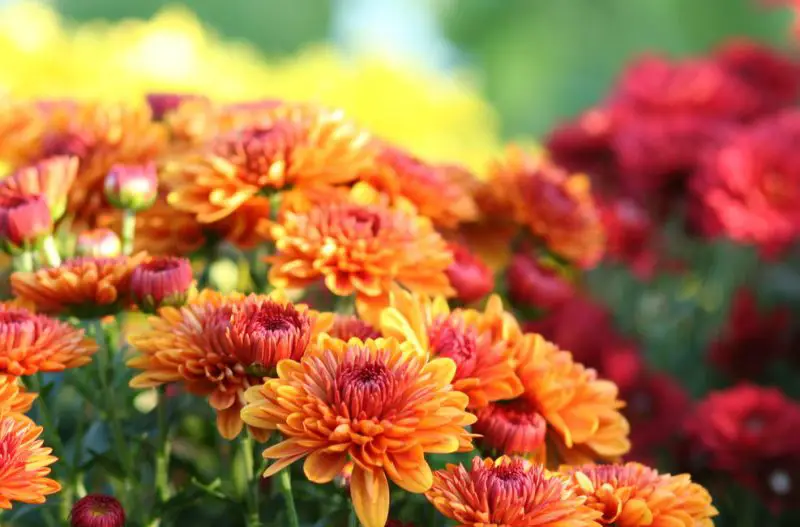
Chrysanthemums, commonly known as mums, are vibrant flowering plants in the Asteraceae family. They’re prized for their bright, long-lasting blooms that appear in late summer through fall. Mums come in a wide range of colors like yellow, red, white, pink, and purple, and feature many flower forms such as pompons, quills, spiders, and buttons.
These plants are compact and bushy, typically growing 1 to 3 feet tall. Their fragrant, lobed leaves and daisy-like flower heads make them a standout in gardens and containers. Mums are photoperiod-sensitive, meaning their flowering is triggered by shorter daylight hours in autumn, making them a seasonal favorite.
Originating in Asia and Europe, chrysanthemums have been cultivated for centuries and hold symbolic meaning in many cultures. Today, they’re widely appreciated for their beauty, versatility, and ability to extend garden color into the cooler months.
What Are Mums?
Mums are herbaceous plants known for producing clusters of tightly packed florets that form large, showy flower heads. The most common garden variety is Chrysanthemum × morifolium, which has been bred extensively for ornamental use.
These flowers vary in appearance, from simple daisy-like types to complex multi-petaled forms. They bloom in late summer to fall and thrive best in full sun with well-drained soil. Mums are ideal for garden beds, borders, and pots, offering rich seasonal color when many other plants have finished blooming.
Thanks to their adaptability and range of varieties, mums are a staple in both home landscapes and commercial floral displays.
Annuals vs. Perennials
Mums are technically perennials, but many are grown as annuals depending on variety and climate. Hardy mums, or garden mums, can survive the winter and bloom again if planted early and cared for properly. These are best suited for USDA Zones 5–9.
Florist mums, often sold in pots, are less cold-tolerant. They’re usually used for short-term decoration and don’t overwinter well outdoors. They may not return unless grown in mild climates or brought indoors before frost.
To grow mums as true perennials, choose hardy types, plant them in spring or early fall, and provide good soil drainage and winter mulch.
Benefits of Growing Mums
Mums offer more than just color. Their late-season blooms help support pollinators like bees and butterflies when other flowers are fading. They’re also known to repel certain pests naturally thanks to pyrethrin, a compound found in their flowers.
Easy to care for and highly ornamental, mums thrive in sunny spots and require little maintenance once established. They’re excellent for cut flowers, seasonal borders, and container displays. Their long bloom time and low upkeep make them a rewarding addition to any garden.
Ideal Conditions for Growing Mums
Sunlight Requirements
Chrysanthemums thrive in full sunlight and need at least six hours of direct light each day to perform their best. The more sunlight they receive, the more flowers they will produce, and the colors will appear richer and more vibrant. Adequate sun exposure also promotes strong, compact growth and helps prevent the plant from becoming tall and leggy.
Sunlight not only boosts blooming but also supports the plant’s overall health by improving air circulation and drying moisture from the leaves. This reduces the risk of fungal diseases and helps mums maintain a clean, tidy appearance throughout the growing season. For best results, choose a location that receives morning to early afternoon sun and avoid placing mums in shady or heavily filtered areas.
Soil Type and pH
Mums prefer well-drained, loamy soil that retains some moisture without becoming soggy. Soil rich in organic matter offers the best environment for strong root development and nutrient uptake. Before planting, it’s beneficial to amend the soil with compost, aged manure, or other organic materials to improve texture and fertility.
The ideal soil pH for mums is between 6.5 and 7.0, which is slightly acidic to neutral. Soil that is too acidic or alkaline can hinder nutrient absorption and lead to stunted growth or yellowing leaves. If your soil is heavy clay or tends to hold water, consider adding sand, peat moss, or perlite to improve drainage. Raised beds or mounded soil can also help prevent waterlogging and root rot, especially in areas with frequent rain or poor drainage.
Watering Needs
Consistent and balanced watering is essential for mums, especially during the budding and blooming phases. These plants prefer moist soil but are sensitive to overwatering. Water the plants deeply so that moisture reaches the root zone, then allow the top inch of soil to dry out slightly before watering again.
Avoid overhead watering whenever possible, as wet foliage can encourage fungal diseases such as powdery mildew or leaf spot. Instead, use a soaker hose or water at the base of the plant. It’s best to water in the early morning so any excess moisture on the leaves can dry quickly in the sun.
Mulching around the base of the plant with organic materials like shredded bark or straw helps regulate soil moisture, suppress weeds, and protect roots from temperature fluctuations. This practice is especially useful in maintaining healthy mums throughout the growing season.
Planting Mum Plants
When to Plant Mums
For the best results and long-term growth, mums should be planted in the spring. Planting during this time allows the roots to become well-established before colder weather arrives. A strong root system is essential for surviving winter conditions and ensuring the plant comes back the following year. While many gardeners buy mums in the fall for their colorful blooms, fall-planted mums often don’t survive freezing temperatures unless they are heavily mulched and grown in regions with mild winters. Spring planting, by contrast, gives mums the best chance to thrive and produce vigorous, long-lasting blooms in the coming seasons.
Choosing the Right Location
Selecting an ideal location is crucial to the success of your mum plants. Mums grow best in spots that receive full sun for most of the day, as they require strong light to bloom profusely. The planting area should also have good air circulation, which helps reduce the risk of fungal diseases. Avoid low-lying spots in your garden where rainwater might collect and sit, as mums dislike soggy roots. If your soil is heavy clay or poorly draining, consider using raised beds or elevated planting areas to ensure proper drainage. Proper spacing is also important—plant mums 18 to 24 inches apart to give each plant room to grow and allow air to circulate freely between them.
How to Plant Mums
Start by preparing the soil thoroughly. Loosen the ground to a depth of about 12 inches, breaking up any compacted areas, and mix in generous amounts of compost or organic matter to enrich the soil. Once the soil is ready, dig a planting hole that is about twice the width of the root ball and just as deep. Place the mum in the hole so that the top of the root ball is level with the surrounding ground surface.
Gently backfill the hole with soil, pressing lightly to eliminate air pockets. After planting, water the area deeply to help the soil settle and to encourage the roots to begin growing outward. Finally, apply a layer of mulch around the base of the plant to retain soil moisture, regulate temperature, and suppress weed growth. Keep the mulch a few inches away from the stem to prevent rot. With proper planting and care, mums will establish quickly and reward you with vibrant blooms year after year.
Mum Plant Care Throughout the Seasons
Spring and Early Summer Care
As mums begin their growth cycle in spring, proper care during this time sets the stage for a successful blooming season. When plants reach about six inches in height, start pinching back the stems by removing the top inch from each one. This encourages bushier growth and increases the number of flowering branches. Continue this pinching process every two to three weeks until about mid-July. This not only improves the plant’s shape but also delays blooming slightly, allowing for a more concentrated fall display.
During this period, it’s also important to fertilize your mums regularly. A balanced 10-10-10 fertilizer should be applied once a month to support healthy development. Avoid using high-nitrogen fertilizers, as they can cause the plant to produce excessive foliage at the expense of flowers. Maintain consistent moisture in the soil, especially during dry spells, but be careful not to overwater. A steady watering schedule and light mulching can help keep the soil evenly moist.
Mid to Late Summer
By mid-July, stop pinching your mums to give the plants time to set flower buds. From this point onward, focus on maintaining good growing conditions rather than shaping the plant. Apply mulch around the base of the plant to help conserve moisture and keep the roots cool during hot summer days. Mulch also helps prevent weed growth, reducing competition for nutrients and water.
Keep an eye out for common pests like aphids, spider mites, and leafminers, which tend to appear during the warmer months. Inspect the undersides of leaves and new growth regularly. If pests are found, treat the plants with insecticidal soap or neem oil to control infestations naturally and safely. Regular monitoring can prevent problems from becoming severe.
Fall Care
In the fall, mums reach their peak blooming period. To extend the display, remove faded blooms as they appear. Deadheading helps redirect energy into producing new flowers rather than seed development. Continue watering your mums regularly, ensuring that the soil remains moist but not soggy while they are actively flowering.
Once the first hard frost arrives and the blooms begin to fade, it’s time to prepare the plant for dormancy. Cut the stems back to about six inches above the ground, and apply a thick layer of mulch, such as shredded bark or straw, around the base of the plant. This added layer insulates the root system and helps protect it from extreme temperature changes during winter.
Winter Care
During the winter months, mums enter a period of dormancy. To ensure their survival, maintain a protective mulch covering about four to six inches deep over the crown of each plant. This insulates the roots against freezing temperatures and prevents frost heaving during freeze-thaw cycles.
In regions with mild winters, mums may need occasional watering if the weather remains dry for extended periods. Check the soil occasionally and water lightly if it becomes completely dry, but avoid saturating the soil. With the right care through winter, your mums will be ready to bounce back with fresh growth in spring.
Fertilizing Mums Properly
Nutrient Requirements
Mums have moderate nutrient needs, but they respond well to a consistent fertilizing routine throughout the growing season. Like many flowering plants, mums thrive when they receive a balanced supply of essential nutrients. Nitrogen encourages healthy leaf and stem development, phosphorus supports strong root systems, and potassium enhances flower production. Providing these nutrients in the right ratios at the appropriate stages of growth will result in lush foliage and abundant blooms.
Fertilizing Schedule
Begin fertilizing in early spring as new growth appears, and continue through mid-summer. A balanced fertilizer such as 10-10-10 or 20-10-20 works well when applied once a month. This helps the plant build a solid framework of stems and leaves that can support future flowering. As summer progresses and flower buds start to develop, typically by late July or early August, it’s beneficial to switch to a fertilizer higher in phosphorus, like a 5-10-5 formulation. This change encourages the plant to focus energy on producing blooms rather than foliage. Stop fertilizing in the fall, as late-season feeding can promote tender new growth that won’t withstand cold temperatures and may reduce the plant’s ability to overwinter successfully.
Organic Fertilizer Options
For gardeners who prefer organic methods, there are several excellent options that nourish mums while improving overall soil quality. Composted manure is rich in nutrients and adds valuable organic matter to the soil. Fish emulsion, a liquid fertilizer made from fish byproducts, is a fast-acting source of nitrogen and trace elements. Bone meal is high in phosphorus and is particularly useful in promoting strong root development and abundant flowering. Compost tea is another effective organic option, offering a balanced blend of nutrients and beneficial microorganisms. These natural fertilizers can be used throughout the growing season and are especially helpful for long-term soil health.
Pruning and Deadheading
How to Pinch Mums
Pinching is one of the most important steps in maintaining healthy, attractive mum plants. It encourages a fuller, bushier shape and prevents the plant from becoming tall and leggy. In addition, pinching results in more flower-producing stems, which leads to a more impressive floral display. Begin pinching in the spring once the plants reach about six inches in height. Simply use your fingers to remove the top inch of each new shoot. This can be done every two to three weeks, and the process should be continued until mid-July to allow enough time for flower buds to form before the blooming season begins.
Deadheading Blooms
As your mums begin to flower, regular deadheading is key to maintaining their vibrant appearance. Removing spent blooms encourages the plant to redirect its energy into producing new flower buds rather than developing seeds. This results in a longer blooming period and keeps the plant looking tidy. To deadhead properly, use clean, sharp garden shears or gently pinch off the faded flowers just above a healthy leaf node. This technique not only promotes continuous flowering but also improves overall plant health by preventing mold and rot that can form on decaying petals.
Cutting Back in Fall
Once the first hard frost has damaged the foliage and blooming has finished, it’s time to cut the plant back for the winter. Use pruners to trim the stems down to about six inches above the ground. This helps conserve the plant’s energy and signals the start of its dormant phase. Leaving a portion of the stem intact over winter offers additional protection to the crown of the plant, especially in colder climates. The remaining stalks can also catch fallen leaves and snow, providing a natural insulating layer until new growth resumes in spring.
Propagating Mum Plants
Division
Division is the most widely used and reliable method for propagating mums. It not only helps produce new plants but also rejuvenates older clumps that may have become overcrowded. Every two to three years, preferably in early spring when new growth begins to emerge, dig up the entire mum plant. Carefully separate the root ball into several smaller clumps, making sure each section has strong roots and healthy shoots. Discard any old, woody, or weak sections. Replant the healthiest divisions in prepared garden beds or containers, spacing them properly to allow room for future growth. Water thoroughly after transplanting to help the roots establish.
Stem Cuttings
Stem cuttings are another effective way to propagate mums, especially during spring or early summer when the plants are actively growing. Select a healthy, non-flowering stem and cut a 4 to 6 inch section just below a leaf node. Remove the lower leaves to expose the stem and dip the cut end in rooting hormone to encourage root development. Plant the cutting in a moist, well-draining potting mix and cover it with a plastic dome or bag to maintain humidity. Place the container in a warm, bright area out of direct sunlight. With consistent moisture and humidity, roots should form within a few weeks, after which the new plant can be gradually acclimated to outdoor conditions.
Seed Propagation
Although growing mums from seed is less common due to hybridization and unpredictable traits, it’s still a viable option for gardeners interested in experimenting. Start by sowing seeds indoors six to eight weeks before the last expected frost. Use seed-starting trays filled with a light, sterile growing medium, and keep the trays in a warm area with bright, indirect light. Keep the soil moist but not soggy. Once the seedlings develop their second set of true leaves, they can be transplanted into individual pots. When all danger of frost has passed, the young plants can be moved outdoors and planted in garden beds or containers.
Common Problems and Solutions
Pests
Mum plants are vulnerable to several common garden pests, but most can be managed with simple treatments. Aphids, tiny green insects, often cluster on new growth and feed by sucking plant sap, which can lead to stunted development and distorted leaves. These pests can be effectively controlled using insecticidal soap or a strong blast of water to dislodge them. Spider mites are another frequent issue; they thrive in dry conditions and leave behind fine webbing along with tiny yellow or white specks on the leaves. Increasing humidity and spraying the foliage with neem oil usually keeps them under control. Leafminers, which create winding tunnels in leaves as they feed between layers, are best managed by removing and disposing of affected foliage to prevent further infestation.
Diseases
Chrysanthemums can also be affected by various fungal diseases, particularly in damp or crowded conditions. Powdery mildew appears as a white, powdery layer on the leaf surfaces and is typically caused by poor air circulation and excessive moisture. To prevent it, ensure proper plant spacing and avoid watering overhead. Rust presents itself as small yellow spots on the upper side of leaves, with rusty orange spores on the underside. Infected leaves should be promptly removed, and fungicides can help if the issue persists. Botrytis blight, also known as gray mold, affects flowers and stems, especially during cool, wet weather. Infected areas turn mushy and gray. To manage it, remove any diseased parts, reduce humidity, and apply fungicidal sprays when necessary.
Environmental Stress
Environmental factors can also lead to poor mum performance. One of the most common issues is leggy growth, where the plant becomes tall and sparse. This typically results from inadequate sunlight or a lack of regular pinching. To correct it, relocate the plant to a sunnier area and continue pinching stems during the growing season. Another common problem is root rot, often caused by waterlogged or poorly draining soil. Symptoms include wilting and blackened roots. The best solution is to improve soil drainage, avoid overwatering, and use raised beds or containers when necessary to ensure the roots stay healthy and dry.
Best Mum Varieties to Grow
Garden Mums (Chrysanthemum × morifolium)
Garden mums are the most popular type for outdoor planting and are especially valued for their hardiness and long-lasting blooms. These perennials thrive in a variety of climates and come in an impressive range of colors and flower forms, making them a versatile option for landscape use. With proper care, they return year after year, producing vibrant displays in late summer and fall.
Cushion Mums
Cushion mums are compact and dome-shaped, making them ideal for borders, front yards, or container gardens. These mums are prized for their tidy, uniform appearance and require less pinching than other varieties to maintain their shape. Their dense, low-growing habit ensures full coverage of blooms, creating a soft, mounded effect that works well in both formal and informal settings.
Decorative Mums
Decorative mums are known for their large, lush flower heads that are perfect for bold, eye-catching arrangements. Though often grown as annuals due to their limited resistance to frost, they offer one of the most striking floral displays among all mum types. These mums are frequently used in seasonal garden beds, porch pots, and festive fall decorations.
Spider Mums
Spider mums stand out for their unusual, long, threadlike petals that resemble spider legs. Their dramatic shape and exotic look make them a favorite for floral arrangements and indoor displays. While they may require a bit more care, including protection from harsh weather, their unique beauty makes them a standout addition to any mum collection.
Growing Mums in Containers
Pot Selection and Soil
Growing mums in containers is a great option for gardeners with limited space or those who want portable seasonal color. Choose pots that have sufficient drainage holes to prevent water buildup, which can lead to root rot. Use a well-draining, high-quality potting mix enriched with compost or organic matter. Avoid using heavy garden soil in containers, as it tends to compact and restrict healthy root development.
Container Care Tips
To keep potted mums thriving, place the containers in a location that receives full sunlight for at least six hours a day. Water thoroughly whenever the top inch of soil feels dry, but don’t let the soil become soggy. During the growing season, feed your mums every two to three weeks with a balanced fertilizer to encourage vigorous growth and blooming. Regular deadheading—removing spent flowers—will promote continuous blooms and maintain the plant’s tidy appearance.
Overwintering Potted Mums
When temperatures begin to drop in late fall, overwintering your container mums becomes important. Move the pots to a sheltered, unheated area such as a garage or shed where temperatures remain above freezing. Cut back the stems to about 6 inches and reduce watering to a minimum, just enough to prevent the soil from completely drying out. Once spring arrives and the danger of frost has passed, bring the plants back outside to resume active growth.
Companion Planting with Mums
Great Companions
Mums pair well with a variety of other plants that thrive in the same conditions. Pansies and violas are excellent choices, offering bright, cheerful blooms that complement the colors of mums. They also enjoy similar sunlight and watering needs, making care routines easier to manage. Ornamental kale is another great companion, adding striking foliage texture and color while withstanding the cool temperatures of fall. Asters make an ideal partner too, as they bloom around the same time and help attract pollinators like bees and butterflies to your garden.
Plants to Avoid
While mums are generally easy to grow alongside other plants, it’s best to avoid certain companions. Aggressive groundcovers or fast-growing shrubs can crowd out mums and compete for vital water and nutrients. This can stunt growth and reduce flowering. Additionally, avoid planting mums near species that prefer very dry or overly wet conditions, as mismatched watering needs can lead to stress or root diseases. Choosing the right companions ensures your mums stay healthy and vibrant throughout the season.
Landscaping Ideas with Mums
Front Yard Borders
Mums make excellent border plants for front yards, especially in the fall when many other flowers begin to fade. Plant them along walkways, driveways, or garden edges to create a vibrant line of color. For a more dynamic display, mix different mum varieties by height, bloom shape, and color. Combining tall and compact types adds visual interest and helps fill space more effectively.
Fall Containers
For a festive and seasonal touch, mums are perfect for fall-themed containers. Pair them with pumpkins, gourds, ornamental grasses, and trailing vines in decorative pots or baskets. Choose contrasting colors and textures to create a balanced, eye-catching arrangement. These containers can be placed on porches, patios, or entryways to instantly elevate curb appeal during the autumn months.
Mixed Flower Beds
Mums can be seamlessly integrated into mixed perennial beds to enhance seasonal interest. Combine them with late-blooming plants like sedum, goldenrod, and asters for a garden that stays colorful into fall. These combinations not only look beautiful but also provide nectar for pollinators at a time when food sources are becoming scarce. The result is a vibrant, biodiverse flower bed with lasting appeal.
Frequently Asked Questions
Do mums come back every year?
Yes, if you plant hardy garden mums in spring and provide winter protection, they will return year after year.
Why aren’t my mums blooming?
Common causes include too much shade, lack of pinching, or overly rich soil that promotes leaves over flowers.
Can I grow mums indoors?
Yes, mums can be grown indoors in containers with bright light and good air circulation. However, they may not rebloom indoors without proper dormancy.
Final Thoughts
Mums are an excellent addition to any garden or container landscape, offering brilliant colors and versatility in care. With the right planting techniques, seasonal maintenance, and variety selection, you can enjoy these cheerful blooms for many years. Whether you’re a beginner gardener or a seasoned pro, mums are a rewarding choice that thrives with attention and care.