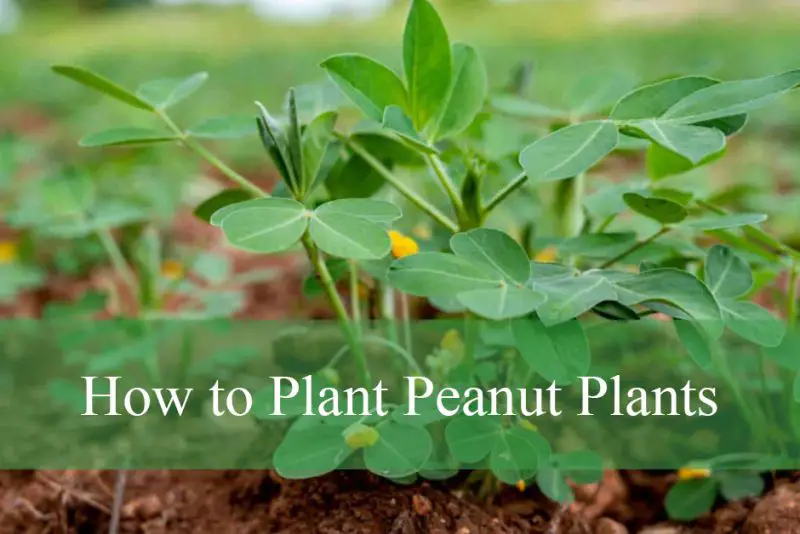
Peanut plants are a fascinating and rewarding crop to grow, especially for home gardeners seeking something unique and nutritious. Unlike most nuts, peanuts grow underground, and this quirk in their biology makes them both interesting and slightly challenging to cultivate. With the right guidance and careful attention to their needs, you can enjoy a generous peanut harvest from your backyard or garden plot. Understanding the growing requirements and the life cycle of peanut plants is essential to achieving a successful yield.
Before planting peanuts, it’s important to know they require a long, warm growing season. Most varieties need at least 120 frost-free days, which means they are best suited for USDA hardiness zones 7 through 11. In cooler climates, you can still grow peanuts by starting them indoors or using protective structures like greenhouses or cold frames. The key is to ensure the plants receive enough heat and time to fully develop.
The peanut plant, or Arachis hypogaea, is a legume, and its unique ability to fix nitrogen into the soil makes it a beneficial crop for soil health. After flowering, the plant produces pegs that extend into the soil where the peanuts develop. This means the soil must be loose, well-drained, and sandy enough to allow easy penetration and growth of the pods. Heavy clay or compacted soils can hinder pod formation and reduce yields.
Choosing the Right Peanut Variety for Your Region
Peanut varieties are broadly classified into four main types: Runner, Virginia, Spanish, and Valencia. Each type has its own growing characteristics and ideal uses. Runners are commonly grown in the southeastern U.S. and are known for their uniform size, making them ideal for commercial peanut butter production. Virginia peanuts are larger and favored for roasting. Spanish peanuts are smaller with red skins and high oil content, often used in candies. Valencia peanuts typically have three or more kernels per pod and are very sweet.
Selecting a variety that suits your climate and intended use is crucial. In northern areas with shorter growing seasons, fast-maturing varieties like Spanish or Valencia are preferable. Gardeners in warmer regions can experiment with multiple types and even save seeds from successful crops for future seasons. Always ensure your seed peanuts are untreated and raw, not roasted or salted, as those will not germinate.
Sourcing quality seeds is also an important step. You can often find seed peanuts from agricultural suppliers, local nurseries, or online stores specializing in heirloom or specialty crops. Make sure the seeds are certified disease-free and check reviews or grower feedback when possible. High-quality seed peanuts give your plants a strong start and help reduce the risk of crop failure.
Preparing Soil and Site Conditions for Planting
The success of your peanut crop depends heavily on soil preparation. Begin by selecting a sunny site that receives at least six to eight hours of direct sunlight each day. Peanuts are sun-loving plants that require full light exposure for optimal pod development. Shady or partially shaded areas may produce lush foliage but poor yields.
Test your soil’s pH and nutrient levels before planting. Peanuts prefer slightly acidic to neutral soil with a pH between 6.0 and 6.5. If your soil is too acidic or alkaline, amendments such as lime or sulfur may be needed to adjust the pH. Incorporate compost or aged manure to enrich the soil and improve its texture. Avoid over-fertilizing with nitrogen-rich products, as peanuts fix their own nitrogen and excessive amounts can hinder pod development.
To ensure proper aeration and drainage, till the soil to a depth of at least eight inches. Break up large clumps and remove rocks or debris that could obstruct peg penetration. Raised beds are an excellent option if you’re dealing with heavy clay soils, as they improve drainage and give you more control over soil composition.
Germinating and Planting Peanut Seeds
Peanut seeds should be planted after the danger of frost has passed and soil temperatures have reached at least 65°F (18°C). In colder regions, you can start seeds indoors four to six weeks before the last expected frost. Use biodegradable pots to avoid disturbing the roots when transplanting.
Carefully remove the shells from raw, untreated peanuts, making sure not to damage the thin papery seed coat. This coat protects the seed and supports germination. If starting indoors, plant seeds about one to two inches deep in loose, moist soil. Place them in a warm, sunny location or use grow lights to provide consistent heat and light.
For direct sowing outdoors, plant seeds one to two inches deep and four to six inches apart in rows spaced 24 to 36 inches apart. Keep the soil consistently moist but not waterlogged. Within 7 to 14 days, you should see seedlings emerge. Thin the plants if necessary to allow room for proper root and pod development.
Nurturing Peanut Plants Throughout the Growing Season
Once established, peanut plants are relatively low maintenance, but they do require consistent care. Regular watering is essential, particularly during flowering and pod formation. Aim to keep the soil evenly moist, especially during dry periods. Avoid overhead watering to reduce the risk of fungal diseases, and use soaker hoses or drip irrigation for best results.
Peanut plants will begin to flower around 30 to 40 days after planting. After pollination, the fertilized flowers form pegs that grow downward into the soil. This is a critical stage, and it’s important to keep the soil loose and weed-free to avoid interference with peg development. Cultivate gently around the base of the plants to prevent damaging shallow roots.
Mulching can help retain moisture, suppress weeds, and maintain an even soil temperature. Use straw, shredded leaves, or other organic mulch materials. However, keep mulch away from the crown of the plant to prevent rot. Periodically check for pests such as aphids, cutworms, or spider mites, and address infestations promptly using organic methods or approved insecticides.
Recognizing the Signs of Maturity and Harvesting Peanuts
Peanut plants typically take between 120 to 150 days to mature, depending on the variety and growing conditions. As the end of the season approaches, you’ll notice the leaves begin to yellow and wither. This is a natural part of the plant’s lifecycle and a sign that the peanuts are nearly ready to harvest.
To check for readiness, gently dig around the base of a few plants and examine the pods. Mature peanuts will have a firm shell with the distinctive netted texture and a developed kernel inside. If the majority of pods meet these criteria, it’s time to harvest. Avoid delaying harvest for too long, as overripe peanuts can become moldy or attract pests.
Carefully lift the entire plant from the ground, using a garden fork to minimize damage. Shake off excess soil and hang the plants upside down in a warm, dry, and well-ventilated area to cure. Allow them to dry for two to three weeks before removing the peanuts from the plants. Proper curing enhances flavor and extends storage life.
Post-Harvest Handling and Storage Tips
Once the peanuts are dry, you can remove them from the plants and store them in their shells or shell them for immediate use. Keep unshelled peanuts in a cool, dry place in breathable containers like mesh bags or paper sacks. Avoid storing them in plastic containers that trap moisture and promote mold.
For longer storage, consider roasting the peanuts. Roasting not only enhances flavor but also reduces moisture content, helping to preserve freshness. You can roast peanuts in the oven at 350°F (175°C) for 15 to 20 minutes, stirring occasionally for even browning. Allow them to cool completely before storing.
If you plan to save some peanuts for planting next season, select the healthiest and most robust pods. Store seed peanuts in a dry, cool location away from sunlight. Make sure they are clearly labeled and not exposed to any treatments or chemicals. Properly stored seed peanuts can remain viable for up to a year.
Common Mistakes and How to Avoid Them
One of the most common mistakes in growing peanuts is planting in unsuitable soil. Compacted or poorly drained soil can severely limit peg penetration and pod formation. Always prepare the planting site thoroughly and choose raised beds or containers if necessary.
Another frequent error is overwatering or underwatering. While peanuts need consistent moisture, particularly during flowering and pegging, saturated soil can lead to root rot. Monitor rainfall and adjust irrigation based on weather conditions and soil moisture levels.
Skipping soil testing is also a pitfall. Without knowing your soil’s pH and nutrient profile, it’s difficult to provide the right amendments. A simple soil test can prevent many growing issues and support a more productive harvest.
FAQs about Planting Peanut Plants
When is the best time to plant peanut seeds?
The best time to plant peanuts is after the last frost has passed and soil temperatures remain consistently above 65°F (18°C). In regions with short growing seasons, starting seeds indoors four to six weeks early can provide a helpful head start.
Can I grow peanuts in containers or raised beds?
Yes, peanuts adapt well to raised beds and large containers, as long as the soil is loose and deep enough to accommodate peg penetration. Raised beds are especially useful in areas with dense or clay-heavy soils, improving both drainage and soil aeration.
How long does it take for peanuts to mature?
Peanut plants generally require between 120 to 150 days to reach maturity, depending on the variety and growing conditions. Monitoring signs like yellowing leaves and checking pod development will help you determine the right time to harvest.
Do peanuts need a lot of water to grow?
Peanuts thrive with consistent moisture, particularly during flowering and pod formation. While regular watering is important, overwatering can lead to fungal issues or root rot. Well-drained soil and careful irrigation management are key to healthy plants.
Can I plant store-bought peanuts?
Most peanuts sold in stores are roasted or salted, making them non-viable for planting. For growing purposes, use only raw, untreated peanuts labeled as seed-grade. These will germinate properly and produce healthy plants.
How do I know when my peanuts are ready to harvest?
As peanut plants near maturity, their foliage will begin to yellow and dry. At this stage, check a few pods by digging them up. If the shells are firm and contain fully developed kernels, your crop is ready for harvest.
What type of soil is best for growing peanuts?
Peanuts prefer light, sandy, well-drained soils with a pH between 6.0 and 6.5. Avoid compacted or heavy clay soils, as these can interfere with peg penetration and limit pod growth underground.
Final Thoughts on Growing Peanut Plants Successfully
Growing peanut plants is both a fun and educational experience that rewards patience and effort. From selecting the right variety to harvesting and curing your peanuts, each step offers an opportunity to learn more about plant biology and sustainable gardening. With careful attention to soil, temperature, and moisture, even beginners can enjoy a healthy peanut crop.
Whether you’re planting in a backyard garden, raised bed, or large field, peanuts offer both nutritional value and soil improvement benefits. Their unique growing process makes them a conversation piece among homegrown vegetables. Once you’ve tasted freshly harvested, home-roasted peanuts, you’ll understand why many gardeners return to this rewarding crop year after year.
Start planning your peanut garden today, and with the right approach, you’ll soon enjoy a bumper harvest that’s as satisfying as it is delicious.