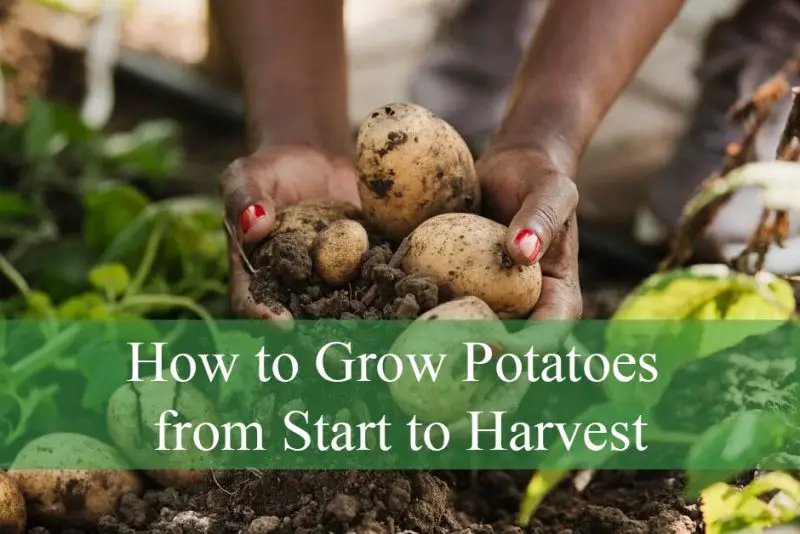
Growing your own potatoes is one of the most rewarding gardening experiences. These humble tubers are easy to cultivate, require minimal maintenance, and produce abundant harvests. Whether you have a sprawling backyard or just a few containers on a balcony, you can successfully grow potatoes from start to harvest.
In this complete guide, we will walk you through each step of the process, from choosing the right variety to harvesting and storing your homegrown potatoes. Follow these tips to enjoy fresh, delicious potatoes right from your garden.
Why Grow Your Own Potatoes?
Nutritional Value and Taste
Homegrown potatoes offer superior nutritional benefits and flavor compared to store-bought varieties. Freshly harvested potatoes are rich in essential nutrients such as fiber, which aids digestion, and potassium, which supports heart health and blood pressure regulation. They are also excellent sources of vitamins B6 and C, playing key roles in brain function and immune system support. Additionally, potatoes contain antioxidants like flavonoids and carotenoids that help fight free radicals in the body.
Taste is another compelling reason to grow your own. Unlike supermarket potatoes that may have been stored for weeks or even months, homegrown potatoes retain their natural sugars and moisture, giving them a creamier texture and fuller, earthier flavor. Whether roasted, mashed, or boiled, the taste of freshly dug potatoes is noticeably more vibrant and satisfying.
Beyond nutrition and taste, growing your own potatoes allows you to control the use of chemicals and pesticides. You can grow them organically, ensuring a cleaner, healthier food source for your family.
Cost-Effective and Sustainable
Growing potatoes at home is both economical and environmentally friendly. With just a small initial investment in certified seed potatoes and basic gardening supplies, you can produce a significant harvest. A single potato tuber can yield several pounds of edible potatoes, making it one of the most productive vegetables per square foot of garden space.
This self-sufficiency also helps reduce household grocery bills, especially if you grow storage-friendly varieties that can last throughout the winter. By growing your own food, you reduce the demand for commercially grown produce, which often involves resource-intensive farming practices and long-distance transportation.
In terms of sustainability, cultivating potatoes at home contributes to a smaller carbon footprint. You avoid the emissions associated with packaging, refrigeration, and delivery that come with supermarket produce. Composting kitchen scraps into your potato bed also enhances the soil and completes a closed-loop system that benefits both your garden and the environment.
Versatility in the Garden
Potatoes are incredibly adaptable and can thrive in a wide range of growing conditions, making them a suitable crop for gardeners of all skill levels. Whether you have a sprawling backyard or just a small patio, you can successfully grow potatoes in raised beds, traditional in-ground rows, large containers, or even grow bags and buckets. This flexibility makes them ideal for urban gardening and limited-space environments.
Moreover, potatoes improve soil health by adding organic matter through their dense root systems. As the plants grow and break down, they enrich the soil with nutrients and help maintain its structure. Potatoes are also an excellent choice for crop rotation. Planting them in different areas each year helps prevent the buildup of soil-borne diseases and pests, improving the long-term productivity of your garden.
With their ease of growth, low maintenance needs, and high yields, potatoes are not only practical but also an enjoyable addition to any home garden.
Choosing the Right Potato Variety
Early, Mid-Season, and Late Varieties
Potatoes are typically categorized by how long they take to reach maturity: early, mid-season, or late. Understanding these classifications is essential for planning your planting schedule and ensuring a continuous harvest throughout the growing season.
Early varieties mature in about 70 to 90 days and are ideal for gardeners who want quick results. These potatoes tend to have thin skins and a waxy texture, making them excellent for boiling and salads. Popular early-season varieties include ‘Red Norland’ and ‘Yukon Gold’, both of which offer smooth textures and a buttery flavor.
Mid-season varieties require approximately 95 to 110 days to mature. These are a great middle-ground choice, offering a balance of yield, storage ability, and culinary versatility. Varieties such as ‘Kennebec’ and ‘Gold Rush’ perform well in a variety of climates and cooking styles.
Late varieties take between 120 and 135 days to mature but typically offer the best yields and storage potential. These are the go-to choice for gardeners looking to store potatoes long-term. Well-known late-season varieties include ‘Russet Burbank’, famous for baking and frying, and ‘Butte’, which is rich in flavor and high in dry matter.
Best Potatoes for Your Climate
Selecting the right potato variety also depends on your local climate and the length of your growing season. In cooler climates or regions with shorter summers, early and mid-season varieties are often the most reliable. They mature quickly, reducing the risk of damage from early frosts or excessive rainfall.
In warmer climates with extended growing periods, late varieties can be planted not just in spring but also in late summer or early fall for a winter harvest, especially in USDA zones 8 and above. These regions give you the flexibility to plant multiple crops per year if timed correctly.
Pay attention to frost dates and soil temperature. Potatoes grow best when soil temperatures are between 45°F and 75°F (7°C to 24°C). By choosing varieties suited to your region’s specific conditions, you can maximize both the quality and quantity of your harvest.
Use Certified Seed Potatoes
One of the most important steps in growing healthy potatoes is starting with certified seed potatoes. Unlike regular store-bought potatoes, which may be treated with sprout inhibitors or carry diseases, certified seed potatoes are disease-free and specifically cultivated for planting purposes.
Look for firm, blemish-free tubers with multiple visible eyes, which are the points from which sprouts will emerge. These eyes are essential for healthy plant growth and the development of a strong root system. Avoid using potatoes from the supermarket, as they can introduce pathogens to your soil and produce poor yields.
Certified seed potatoes are available from garden centers, seed catalogs, and agricultural suppliers, often with a wide selection of varieties tailored to your climate and culinary preferences. Investing in quality seed stock sets the foundation for a bountiful and successful potato crop.
Preparing for Planting
When to Plant Potatoes
Potatoes thrive in cool weather and are best planted in early spring, making them a classic cool-season crop. The ideal planting time is 2 to 4 weeks before the last expected frost date in your region. At this point, the soil is beginning to warm, but the risk of a hard freeze has mostly passed.
For successful sprouting and tuber development, the soil temperature should be at least 45°F (7°C). Planting too early in cold, wet soil can result in poor emergence or rot. Conversely, waiting too long into warm weather can expose plants to heat stress and disease. In most temperate zones, March to early April is the optimal planting window, while gardeners in warmer areas can plant even earlier or prepare for a second crop in the fall.
Monitoring local weather patterns and using a soil thermometer can help ensure you’re planting at just the right time for your region.
Choosing the Right Location
Location is key to growing healthy, productive potato plants. Potatoes need full sun, which means they require at least 6 to 8 hours of direct sunlight daily. Adequate sunlight ensures strong foliage growth and maximizes tuber production.
Choose a site with well-drained, loose soil. Avoid low-lying areas where water tends to collect, as soggy conditions can lead to rot and fungal infections. Raised beds or mounded rows work particularly well to improve drainage in areas with heavy soil.
It’s also important to practice crop rotation. Avoid planting potatoes in areas where nightshade family members such as tomatoes, peppers, or eggplants grew the previous year. These crops share common pests and diseases, such as early blight and nematodes, which can persist in the soil and negatively impact your potato harvest.
Soil Preparation
Proper soil preparation is one of the most critical steps for a successful potato crop. Potatoes prefer slightly acidic soil, with an optimal pH range of 5.0 to 6.0. If your soil is too alkaline, consider amending it with sulfur or composted organic matter to bring the pH down to the desired level.
Before planting, loosen the soil to a depth of 10 to 12 inches to allow for good root development and tuber expansion. Remove any large rocks or compacted clumps that could obstruct growth. Incorporate plenty of compost or well-aged manure, which not only enriches the soil with nutrients but also improves its structure and drainage.
Good aeration and moisture retention are essential, but avoid overly wet conditions. Raised rows or planting mounds can improve both aeration and water runoff. Preparing your soil in advance and ensuring it’s nutrient-rich and well-drained will give your potato plants the best possible start.
Sprouting (Chitting) Seed Potatoes
What is Chitting?
Chitting is the process of pre-sprouting seed potatoes before planting to give them a stronger start in the garden. By encouraging early sprout development, chitting allows the plants to establish more quickly once they’re in the soil. This can lead to faster growth, earlier harvests, and potentially higher yields—especially in regions with shorter growing seasons.
This technique is particularly beneficial for early and mid-season varieties, as it gives the developing plant a head start during the cooler part of the growing season. Chitting is simple, requires minimal equipment, and can make a noticeable difference in plant vigor.
The ideal environment for chitting is a bright, cool, and frost-free space, such as a windowsill in an unheated room or a well-ventilated garage. The process usually takes 2 to 4 weeks, depending on light and temperature conditions.
How to Chit Potatoes
To chit your seed potatoes, begin by placing them in an egg carton, seed tray, or shallow box. Arrange the tubers so that the “eyes”—the small dimpled areas on the potato skin—face upward, as this is where sprouts will emerge. Avoid stacking them on top of each other; good air circulation is important.
Leave the potatoes in a well-lit area, but out of direct, intense sunlight. A steady temperature of 50°F to 60°F (10°C to 15°C) is ideal. Within a few days to a week, you’ll begin to see short, green or purple shoots emerging from the eyes.
When the sprouts reach about ½ to 1 inch (1.2 to 2.5 cm) in length, the seed potatoes are ready for planting. Be gentle when handling them, as the shoots are delicate and can break easily. Well-chitted seed potatoes will establish themselves quickly in the ground, giving your crop a strong, healthy start.
Planting Potatoes
Cutting and Curing Tubers
If your seed potatoes are larger than a chicken egg, it’s best to cut them into smaller pieces to maximize your planting stock. Each chunk should measure approximately 1.5 to 2 inches in size and contain at least one good “eye”, which is the spot where a sprout will form. Cutting too small or using pieces without eyes may result in poor or no growth.
After cutting, it’s important to allow the pieces to cure before planting. Spread them out in a single layer in a cool, dry, well-ventilated area, out of direct sunlight. Within 2 to 3 days, the cut surfaces will develop a dry, thickened “callus” that helps protect against rot and disease in the soil. Curing is especially important in damp climates where freshly cut seed pieces are more prone to fungal infections.
Cured seed pieces are more resilient and less likely to rot, giving your potatoes a better chance of thriving once planted.
Spacing and Depth
Proper spacing and planting depth are essential for healthy growth and high yields. Start by digging trenches 6 to 8 inches deep and spacing them about 12 inches apart if you’re planting in rows. This setup allows room for hilling soil around the plants as they grow and also promotes good air circulation.
Place the cured seed potato pieces 12 inches apart within each trench, with the eye or sprout side facing upward. This spacing ensures that each plant has enough room to develop a strong root system and produce a good number of tubers.
After placing the seed pieces in the trench, cover them with 3 to 4 inches of soil—not the full trench depth yet. As the plants grow, you’ll gradually add more soil around the stems to support tuber formation and prevent them from being exposed to sunlight.
Watering After Planting
After planting, thoroughly water the soil to help settle it around the seed pieces and initiate root development. The soil should be kept evenly moist, but not soggy, throughout the growing season. Consistent moisture is key for uniform tuber development and to prevent deformities such as cracks or hollow centers.
However, avoid heavy watering immediately after planting, especially before sprouts break through the surface. Overwatering at this stage can lead to tuber rot, particularly in heavy soils or cool, wet conditions.
As the plants emerge and grow, monitor rainfall and supplement with deep watering as needed, especially during dry spells. Aim for about 1 to 1.5 inches of water per week, adjusting based on temperature and soil type. Mulching between rows can also help retain soil moisture and reduce weeds.
Caring for Potato Plants
Hilling
Hilling is a crucial step in potato cultivation that involves gradually mounding soil around the base of the plants as they grow. Start hilling when the plants are 6 to 8 inches tall, and repeat the process every 2–3 weeks. Each time, add soil up to just below the top leaves, leaving some green foliage exposed.
This process serves multiple purposes: it prevents tubers from being exposed to sunlight (which can turn them green and toxic), supports the plant stems, and encourages more tubers to form along the buried stems. Continue hilling until the plants reach a height of 12 to 18 inches. If you’re growing in containers or bags, simply add more soil or compost as needed.
Watering Requirements
Potatoes require 1 to 2 inches of water per week, depending on climate and soil type. The key is to water deeply and consistently, especially during the critical period of tuber development between weeks 6 and 10 after planting. Irregular watering can cause problems like cracked tubers or low yields.
Ensure the soil remains moist but never soggy, as overwatering can lead to tuber rot and fungal diseases. Using organic mulch such as straw or shredded leaves helps retain moisture, suppress weeds, and keep the soil temperature stable.
Fertilizing
At planting time, incorporate a balanced fertilizer with an N-P-K ratio of 10-10-10 into the soil to support early growth. Once the plants reach about 6 inches tall, apply a side-dressing of low-nitrogen, high-potassium fertilizer—such as a 5-10-10 or 3-6-6 blend—along the sides of the rows.
Avoid excess nitrogen as it promotes lush foliage at the expense of tuber production. Potatoes benefit most from potassium, which enhances tuber development and improves disease resistance. Always follow product instructions for application rates and timing.
Pest and Disease Management
Common pests that affect potatoes include Colorado potato beetles, aphids, and flea beetles. Regularly inspect plants and remove pests by hand-picking or using insecticidal soaps or neem oil. You can also use floating row covers early in the season to keep insects off young plants.
For disease prevention, especially blight and soft rot, maintain good air circulation by ensuring proper spacing between plants and avoid overhead watering. Practice crop rotation, never planting potatoes in the same spot more than once every 3–4 years. If needed, use fungicidal sprays approved for edible crops during humid or rainy periods.
Healthy plants with well-drained soil and proper care are naturally more resilient to both pests and diseases.
Growing Potatoes in Containers
Ideal Container Size and Material
Growing potatoes in containers is a practical option for gardeners with limited space. Choose containers that are at least 16 inches deep and 16 inches wide to allow adequate room for root and tuber development. Good choices include fabric grow bags, large plastic or metal buckets, and raised wooden planters.
The container should have excellent drainage, as soggy soil can cause tubers to rot. If using buckets or tubs, drill multiple drainage holes at the bottom. Fabric grow bags are especially effective because they promote air pruning of roots and reduce waterlogging issues.
Planting in Containers
Begin by adding 4 to 6 inches of high-quality, well-draining potting mix to the bottom of the container. Place seed potatoes (cut and cured if needed) on the soil surface with the eyes facing upward, spacing them 6 to 8 inches apart if the container allows.
Cover the seed pieces with 3 to 4 inches of soil. As the potato plants grow, add more soil or compost to the container in stages, covering the stems halfway up each time. This mimics hilling and encourages more tuber production higher along the stems.
Container Care Tips
Because container soil dries out more quickly than garden beds, consistent watering is crucial, especially during hot or windy weather. Check moisture daily and water when the top inch of soil feels dry. Aim to keep the soil evenly moist but not soaked.
Fertilize with a diluted liquid fertilizer every 2 to 3 weeks, preferably one low in nitrogen and high in potassium and phosphorus to encourage tuber development. Monitor for pests just as you would with in-ground potatoes, and rotate container locations seasonally to reduce disease buildup.
Harvesting Potatoes
When to Harvest
-
New potatoes: These are young, small tubers that can be harvested 2 to 3 weeks after the potato plants begin flowering. New potatoes are tender and have a sweeter, creamier texture. They are ideal for immediate consumption but don’t store well for long periods.
-
Mature potatoes: For full-sized tubers suitable for storage, wait until the plant’s foliage turns yellow and begins to die back, which usually happens 90 to 120 days after planting, depending on the variety. This signals that the potatoes have fully matured underground.
How to Harvest
To harvest, use a garden fork or your hands (wear gloves to protect skin) to gently loosen the soil around the plant. Start digging at least 12 inches away from the main stem to avoid cutting or bruising the tubers. Carefully lift the plant and soil, and collect the potatoes by hand.
It’s best to harvest when the soil is slightly dry, as wet soil tends to stick to tubers and makes digging more difficult. Avoid damaging the potatoes during harvest to reduce the chance of rot or spoilage.
Curing for Storage
After harvesting, cure the potatoes by placing them in a dark, well-ventilated area for 1 to 2 weeks at temperatures around 50–60°F (10–15°C). This curing process allows the potato skins to thicken and heal any minor cuts or bruises, extending their storage life.
Once cured, store potatoes in a cool, dark, and humid environment with temperatures between 38–45°F (3–7°C) to keep them fresh for several months. Avoid storing potatoes near onions or in direct sunlight, which can cause sprouting or greening.
Storing Potatoes
Ideal Storage Conditions
To keep your harvested potatoes fresh and tasty for months, store them in a cool, dark, and humid environment. The ideal temperature range is between 38–45°F (3–7°C). Avoid storing potatoes in the refrigerator, as temperatures that are too cold can convert their starch into sugar, resulting in a sweet taste and undesirable texture.
Use breathable containers such as burlap sacks, cardboard boxes, or woven baskets to allow air circulation, which helps prevent moisture buildup and decay. Keep potatoes away from onions because onions emit gases that can cause potatoes to spoil faster.
How Long Do Potatoes Last?
When stored properly, potatoes can last from 2 to 6 months, depending on the variety and initial condition at harvest. Early varieties tend to have shorter storage lives, while late-season potatoes usually last longer.
Regularly inspect stored potatoes and remove any that show signs of sprouting, softness, or rot to prevent these from spreading to healthy tubers.
Preventing Sprouts and Rot
Maintain a dry and well-ventilated storage area to reduce moisture buildup that promotes rot. To slow down sprouting, you can place an apple in the storage container, as the ethylene gas released by the apple naturally inhibits sprout growth.
Do not wash potatoes before storage, as moisture on the skin increases the risk of mold and rot. Instead, gently brush off excess dirt before curing and storing.
Common Potato Growing Problems
Green Potatoes
When potato tubers are exposed to sunlight, they develop a green coloration caused by the production of solanine, a natural toxin that can be harmful if ingested in large amounts. This greening typically occurs if potatoes are not properly covered with soil during growth or are exposed after harvest.
To prevent green potatoes, regularly hill soil around the plants to keep tubers well-covered and shielded from light. If you notice green spots on harvested potatoes, cut them away before cooking, or discard the tubers if the greening is extensive.
Poor Yields
Low potato yields can result from several factors:
-
Compacted or poorly drained soil restricts root and tuber growth.
-
Inconsistent or insufficient watering during critical growth stages reduces tuber size.
-
Excessive nitrogen fertilization promotes leafy growth at the expense of tuber development.
-
Diseases and pests can damage plants and reduce production.
To improve yields, practice crop rotation, avoid planting potatoes where related crops (tomatoes, peppers) were recently grown, and select disease-resistant potato varieties suited to your climate.
Pests and Diseases
Potatoes are vulnerable to several common pests and diseases:
-
Common scab: Causes rough, corky patches on tuber surfaces.
-
Late blight: A serious fungal disease that causes leaf spots and tuber rot.
-
Wireworms: Larvae that tunnel into tubers causing damage.
Prevent these problems by planting certified disease-free seed potatoes, ensuring good soil drainage, maintaining healthy soil with organic matter, and applying appropriate fungicides or insecticides if necessary. Regularly inspect plants and promptly remove any affected foliage or tubers.
Saving Seed Potatoes
Selecting Seed Stock
To save seed potatoes for the next planting season, start by choosing small to medium-sized tubers from healthy, vigorous plants that produced a good yield. Avoid diseased or damaged potatoes. After harvesting, allow these tubers to cure properly in a cool, dry place for a couple of weeks to toughen their skins before storage.
Storing Seed Potatoes
Store your seed potatoes in paper bags, wooden crates, or ventilated boxes that allow airflow. Keep them in a dark, cool location with temperatures between 40–45°F (4–7°C) to prevent premature sprouting and decay. Regularly check your stored seed potatoes every month to remove any that show signs of rot or excessive sprouting, which can affect next season’s crop quality.
Benefits of Saving Seeds
Saving your own seed potatoes is cost-effective as it reduces the need to buy new seed potatoes each season. Additionally, by selecting tubers from plants that perform well in your garden’s unique soil and climate conditions, you help adapt and improve potato varieties locally over time, leading to healthier crops and potentially higher yields.
Conclusion
Growing potatoes from start to harvest is easier than it seems and highly rewarding. With proper preparation, care, and timing, you can enjoy fresh, flavorful potatoes straight from your garden. Whether in the ground or containers, the process is simple and accessible for gardeners of all experience levels. Follow this complete guide to make the most of your potato-growing journey and reap a delicious harvest year after year.