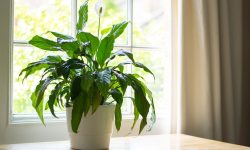
Dieffenbachia, also known as Dumb Cane, is a popular houseplant prized for its lush, variegated leaves and easy-care nature. Whether you are a seasoned plant enthusiast or a beginner, understanding how to properly care for Dieffenbachia will ensure a thriving and healthy plant.
This detailed guide will cover all aspects of Dieffenbachia care, from watering and lighting to propagation and pest control.
Understanding Dieffenbachia
What is Dieffenbachia?
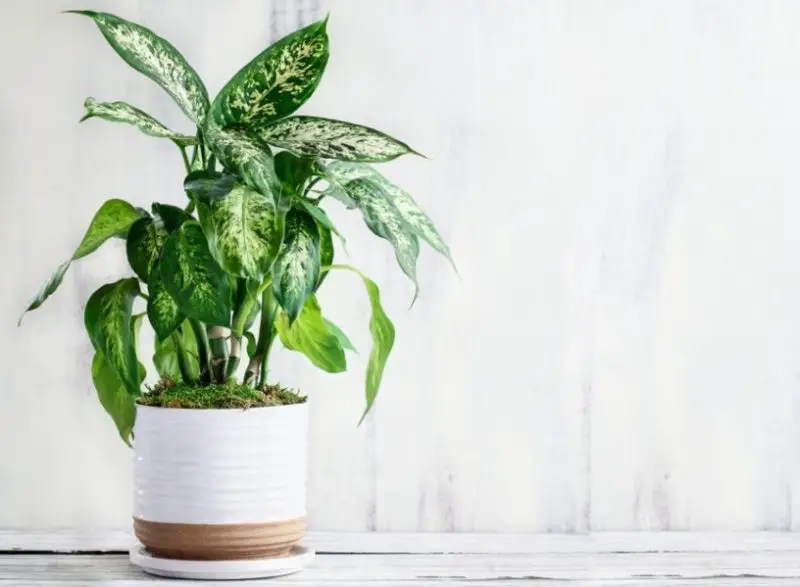
Dieffenbachia is a genus of tropical flowering plants in the Araceae family, native to the lush rainforests of Central and South America. It is cherished as an ornamental houseplant due to its striking foliage and adaptability to indoor environments. The plant’s broad, ovate leaves often feature stunning variegation, with patterns of green, white, and yellow, making it an eye-catching addition to homes and offices.
The common name “Dumb Cane” originates from the plant’s toxic sap, which contains needle-like calcium oxalate crystals. If ingested or if the sap comes into contact with sensitive areas such as the mouth or eyes, it can cause irritation, swelling, and even temporary speech loss. Despite this toxicity, Dieffenbachia remains a favorite among plant enthusiasts due to its low maintenance requirements and ability to purify indoor air.
Popular Varieties of Dieffenbachia
Dieffenbachia comes in several stunning varieties, each with unique leaf patterns and growth habits. Below are some of the most popular types:
- Dieffenbachia seguine – This is one of the most common and widely recognized varieties. It features large, lush green leaves accented with white or cream-colored streaks. Dieffenbachia seguine is known for its fast growth and ability to reach impressive heights, making it a great choice for those looking to add a tropical touch to their space.
- Dieffenbachia ‘Camille’ – A compact variety that stands out due to its elegant creamy white leaves with deep green edges. ‘Camille’ is an excellent option for indoor gardeners who prefer a smaller plant that retains a bold visual impact without overwhelming a space.
- Dieffenbachia ‘Tropic Snow’ – This variety is loved for its dramatic variegation, featuring large leaves adorned with a blend of green and ivory shades. It grows taller than some other types and thrives in bright, indirect light, making it a statement plant in interior decor.
- Dieffenbachia ‘Compacta’ – As the name suggests, this variety is a smaller, more manageable version of its larger relatives. Its bushy growth habit and richly patterned leaves make it perfect for desks, shelves, and smaller living spaces where a touch of greenery is desired without requiring much room.
Dieffenbachia Care Guide
Light Requirements
Dieffenbachia, commonly known as Dumb Cane, flourishes in bright, indirect light, making it an excellent choice for indoor spaces with filtered sunlight. While it can adapt to lower light conditions, insufficient light may slow its growth and cause its vibrant foliage to become less striking. On the other hand, exposure to direct sunlight, especially intense afternoon rays, can scorch the leaves, leading to browning or yellowing edges.
Best Placement for Optimal Growth
To provide the ideal lighting conditions for Dieffenbachia, consider the following placement options:
- Near an east-facing or north-facing window: These locations offer gentle, indirect sunlight that encourages healthy growth without the risk of leaf burn. An east-facing window provides soft morning light, which is particularly beneficial for maintaining the plant’s variegation.
- A few feet away from a south or west-facing window with sheer curtains: South- and west-facing windows tend to receive intense sunlight, especially in the afternoon. Placing the plant a few feet away from the window or using sheer curtains will diffuse the light, preventing damage while still allowing the plant to photosynthesize effectively.
- Under artificial grow lights if natural light is insufficient: If your space lacks adequate natural light, using fluorescent or LED grow lights can help supplement the plant’s light requirements. Position the lights about 12–18 inches above the plant and keep them on for 10–12 hours per day to mimic natural daylight conditions.
Watering Dieffenbachia
Proper watering is essential for maintaining the health and vitality of Dieffenbachia. This tropical plant thrives in consistently moist soil but is highly sensitive to overwatering, which can lead to root rot. Striking the right balance between hydration and proper drainage is key to ensuring its long-term well-being.
How Often to Water
- Check the soil before watering: The best way to determine if your Dieffenbachia needs water is by feeling the top inch of soil. If it feels dry to the touch, it’s time to water. If it still feels slightly damp, wait a few more days before checking again.
- Adjust watering frequency based on the season: During the warmer months (spring and summer), Dieffenbachia experiences active growth and requires more frequent watering, usually once a week. In fall and winter, when growth slows, the plant needs less water—typically every two weeks—to prevent overwatering.
- Use room-temperature water: Cold water can shock the roots, causing stress to the plant. Always use lukewarm or room-temperature water to maintain stable growing conditions.
Additional Watering Tips
- Ensure proper drainage: Use a well-draining potting mix and a container with drainage holes to prevent excess water from sitting at the bottom, which can lead to root rot.
- Avoid letting the plant sit in standing water: If using a saucer under the pot, empty any excess water after watering to prevent soggy soil conditions.
- Monitor humidity levels: Dieffenbachia enjoys moderate to high humidity. If the air is too dry, especially in winter, consider misting the plant occasionally or placing a humidity tray nearby to prevent leaf edges from browning.
Soil Requirements
Choosing the right soil is crucial for Dieffenbachia’s health, as it directly affects water retention, aeration, and nutrient availability. The plant thrives in a well-draining potting mix that retains moisture without becoming waterlogged. Proper soil composition helps prevent root rot while providing essential nutrients for steady growth.
Ideal Soil Composition
A balanced potting mix for Dieffenbachia should include the following components:
- Peat moss or coco coir for moisture retention: These organic materials help the soil retain adequate moisture while preventing it from drying out too quickly. Coco coir is a sustainable alternative to peat moss and provides similar benefits.
- Perlite or sand for aeration: Adding perlite or coarse sand improves drainage and increases soil aeration, ensuring that roots receive enough oxygen and preventing water from pooling at the bottom of the pot.
- Organic compost for nutrients: Compost enriches the soil with essential nutrients, promoting healthy growth and vibrant foliage. It also improves soil structure and enhances microbial activity, which benefits root health.
Recommended Soil Mix Recipe
For an ideal growing medium, you can mix:
- 50% peat moss or coco coir
- 30% perlite or coarse sand
- 20% organic compost
Alternatively, a high-quality commercial potting mix designed for tropical houseplants or aroid plants can also work well.
Additional Soil Tips
- Ensure proper drainage: Use a pot with drainage holes to prevent water from accumulating at the bottom, which can lead to root rot.
- Refresh the soil periodically: Over time, soil can become compacted and lose nutrients. Repotting every 1–2 years with fresh soil will help maintain healthy root growth.
- Monitor for compaction: If the soil becomes too dense, gently aerate it with a fork to improve oxygen flow to the roots.
Temperature and Humidity Needs
Dieffenbachia, being a tropical plant, thrives in warm, humid conditions that mimic its native rainforest environment. Maintaining stable temperatures and adequate humidity levels is crucial for healthy growth, vibrant foliage, and overall plant well-being.
Ideal Temperature Range
- Optimal temperatures: Dieffenbachia grows best in temperatures between 65°F and 75°F (18°C – 24°C). This range ensures active growth and prevents stress-related issues such as leaf drop or discoloration.
- Avoid cold drafts and temperature drops: Temperatures below 50°F (10°C) can cause damage to the plant, leading to stunted growth or wilting. Avoid placing the plant near air conditioners, open windows in winter, or unheated rooms.
- Protection from heat stress: While Dieffenbachia enjoys warmth, excessive heat (above 85°F or 29°C) can cause the leaves to lose moisture too quickly. Keep it away from direct exposure to heating vents or intense summer sun.
Humidity Requirements
Dieffenbachia thrives in a humidity level of 50-70%, which helps keep its leaves lush and prevents issues like brown leaf edges or curling. If indoor humidity is too low, especially during winter months when heaters are running, consider the following methods to increase humidity:
- Misting the leaves: Lightly mist the plant with water every few days to provide temporary moisture. Avoid excessive misting to prevent fungal issues.
- Using a pebble tray: Fill a shallow tray with pebbles and water, then place the pot on top. As the water evaporates, it increases humidity around the plant.
- Placing a humidifier nearby: A humidifier is the most effective way to maintain consistent humidity, especially in dry indoor environments.
- Grouping plants together: Keeping multiple houseplants close to each other helps create a microclimate with increased humidity.
Fertilizing Dieffenbachia
Regular feeding is essential for promoting lush, healthy growth in Dieffenbachia. As a tropical plant, it benefits from a steady supply of nutrients, especially during its active growing season. However, over-fertilization can cause issues such as leaf burn or weak, leggy growth, so it’s important to apply fertilizer correctly and in the right amounts.
Frequency of Fertilization
- During the growing season (spring and summer): Feed Dieffenbachia every 4-6 weeks to support its active growth. This ensures the plant receives the necessary nutrients to develop strong stems and vibrant foliage.
- During fall and winter: Reduce or stop fertilizing, as the plant’s growth naturally slows. Fertilizing during dormancy can lead to excess nutrient buildup in the soil, which may harm the roots.
Best Type of Fertilizer
- Balanced liquid fertilizer: Use a 10-10-10 or 20-20-20 water-soluble fertilizer, which contains equal parts nitrogen (N), phosphorus (P), and potassium (K). This balanced ratio promotes overall plant health—nitrogen encourages lush foliage, phosphorus supports root strength, and potassium enhances resilience.
- Dilution is key: Always dilute the fertilizer to half the recommended strength to avoid over-fertilization, which can cause leaf tip burn or salt buildup in the soil.
Additional Fertilizing Tips
- Apply fertilizer after watering: Feeding a thirsty plant can lead to fertilizer burn. Ensure the soil is slightly moist before applying fertilizer to help distribute nutrients evenly.
- Use organic alternatives: If you prefer organic options, consider fish emulsion, compost tea, or worm castings. These provide slow-releasing nutrients while improving soil quality.
- Flush the soil occasionally: Every few months, flush the soil with plain water to remove excess salts that can accumulate from fertilizers.
Pruning and Maintenance
Regular pruning is essential to keep Dieffenbachia looking lush, tidy, and healthy. Trimming not only removes damaged or aging leaves but also encourages new growth, maintaining a fuller and more attractive appearance. Proper maintenance helps prevent disease and ensures the plant remains vibrant.
Why Pruning is Important
- Encourages bushier growth: Trimming leggy or elongated stems stimulates new growth, making the plant denser and more compact.
- Removes damaged or yellowing leaves: Older or unhealthy leaves should be removed to redirect energy toward healthy foliage.
- Prevents disease and pest issues: Dead or decaying leaves can attract pests and fungal infections, so regular maintenance helps keep the plant in good condition.
How to Prune Dieffenbachia
- Use clean, sharp scissors or pruning shears: Always disinfect your cutting tools before pruning to prevent the spread of disease. Wipe blades with rubbing alcohol or a diluted bleach solution before and after use.
- Remove yellow or damaged leaves: Trim any leaves that show signs of yellowing, browning, or damage at the base of the stem. This helps maintain the plant’s overall health and appearance.
- Trim back leggy stems: If your Dieffenbachia becomes too tall or starts stretching toward the light, cut back long stems just above a leaf node (the point where a leaf attaches to the stem). This encourages new growth from the cut area, resulting in a bushier plant.
- Control height and shape: If the plant becomes too tall or uneven, selectively trim stems to maintain a balanced, aesthetically pleasing shape.
Additional Maintenance Tips
- Wipe the leaves regularly: Dust can accumulate on Dieffenbachia’s large leaves, blocking light absorption. Wipe the leaves gently with a damp cloth to keep them clean and glossy.
- Monitor for pests: Check regularly for common houseplant pests like spider mites, aphids, or mealybugs. If pests appear, wipe leaves with insecticidal soap or neem oil.
- Rotate the plant: To encourage even growth and prevent one-sided leaning, rotate the plant every few weeks so all sides receive equal light exposure.
Repotting Dieffenbachia
Repotting is an important part of Dieffenbachia’s care routine, ensuring the plant has enough space to grow and access fresh nutrients. Over time, the roots can become root-bound, meaning they outgrow their container, leading to restricted growth and reduced nutrient absorption. Regular repotting helps maintain a healthy root system and encourages continued development.
When to Repot
- Every 1-2 years: Dieffenbachia typically needs repotting every one to two years, depending on its growth rate. If the roots start growing out of the drainage holes or the plant appears stunted, it’s time for a new pot.
- Best season for repotting: Spring is the ideal time to repot, as the plant enters its active growing phase, allowing it to adjust quickly to the new soil and container.
How to Repot Dieffenbachia
- Choose the right pot: Select a new pot that is 1-2 inches (2.5-5 cm) larger in diameter than the current one. Ensure it has drainage holes to prevent water from accumulating at the bottom.
- Prepare fresh soil: Use a well-draining mix composed of peat moss or coco coir, perlite or sand, and organic compost to provide adequate moisture retention, aeration, and nutrients.
- Gently remove the plant: Carefully take the plant out of its current pot by tipping it sideways and loosening the soil around the roots. Avoid pulling forcefully to prevent damage.
- Inspect and trim the roots: Check for any rotting, overly tangled, or unhealthy roots. Trim away any dark or mushy roots using clean scissors or pruning shears.
- Place the plant in the new pot: Add a layer of fresh soil at the bottom of the new pot, position the plant in the center, and fill the remaining space with soil, ensuring the roots are well-covered but not deeply buried.
- Water thoroughly: After repotting, water the plant until moisture drains out of the bottom. This helps the soil settle around the roots and reduces transplant shock.
Post-Repotting Care
- Keep in a stable environment: Avoid placing the plant in direct sunlight or near drafts for a few weeks to reduce stress.
- Resume normal care gradually: Wait about one to two weeks before fertilizing to allow the plant to adjust to the new soil.
- Monitor for signs of stress: Some wilting after repotting is normal, but prolonged drooping or yellowing may indicate transplant shock or improper watering.
Propagating Dieffenbachia
Dieffenbachia is an easy-to-propagate houseplant, making it simple to create new plants from a mature one. The most effective propagation method is through stem cuttings, which root well in either water or soil. With proper care, new roots will develop in a few weeks, leading to a thriving new plant.
Steps for Propagation
- Select a healthy stem
- Choose a mature, healthy stem with at least two nodes (small bumps on the stem where leaves and roots grow).
- Use clean, sharp scissors or pruning shears to make a diagonal cut just below a node. Cutting at an angle increases the surface area for rooting.
- Let the cutting dry
- Allow the cutting to dry for a few hours before planting. This helps prevent rot and encourages successful root formation.
- Choose a rooting method
- Water propagation:
- Place the cutting in a container with room-temperature water, ensuring that at least one node is submerged.
- Change the water every few days to prevent bacterial growth.
- Soil propagation:
- Plant the cutting in moist, well-draining soil, burying the node slightly.
- Use a pot with drainage holes to prevent excess water from accumulating.
- Water propagation:
- Provide the right environment
- Keep the cutting in bright, indirect light—avoid direct sun, which can dry out the plant.
- Maintain high humidity by misting the cutting regularly or covering it with a plastic bag to create a greenhouse effect.
- Wait for root development
- Roots should begin forming in 2-4 weeks. Once the roots are at least 1-2 inches long, you can transfer water-propagated cuttings to soil if desired.
Additional Tips for Success
- Use rooting hormone: Dipping the cut end in rooting hormone before planting in soil can speed up root development.
- Avoid overwatering: If propagating in soil, keep the medium moist but not soggy to prevent rot.
- Be patient: Some cuttings may take longer to root depending on environmental conditions like temperature and humidity.
Common Problems and Solutions
Yellowing Leaves
Causes:
- Overwatering – Too much water can lead to root rot, causing leaves to turn yellow.
- Poor drainage – If the soil holds too much water or the pot lacks drainage holes, roots can suffocate.
- Insufficient light – Lack of bright, indirect light can weaken the plant and cause leaf discoloration.
Solutions:
- Adjust watering habits – Water only when the top inch of soil feels dry. Avoid letting the soil become soggy.
- Improve drainage – Ensure the pot has drainage holes and use a well-draining potting mix.
- Increase light exposure – Move the plant to a brighter spot with indirect light or supplement with a grow light if needed.
Drooping Leaves
Causes:
- Underwatering – Dry soil can cause leaves to wilt and lose their firmness.
- Overwatering – Waterlogged soil can suffocate the roots, leading to droopy leaves.
- Temperature stress – Exposure to cold drafts or sudden temperature changes can shock the plant.
Solutions:
- Check soil moisture – Stick a finger into the soil; if it’s dry, water thoroughly. If it’s soggy, let the soil dry out before watering again.
- Maintain a stable temperature – Keep the plant in a warm environment (65°F – 75°F / 18°C – 24°C) and away from air conditioners, heaters, or drafty windows.
Brown Leaf Tips
Causes:
- Low humidity – Dry air can cause leaf tips to turn brown.
- Underwatering – If the soil dries out too often, the plant will struggle to stay hydrated.
- Excessive fertilizer – Too much fertilizer can build up salts in the soil, leading to leaf burn.
Solutions:
- Increase humidity – Mist the leaves, place a pebble tray with water nearby, or use a humidifier to maintain 50-70% humidity.
- Water consistently – Keep the soil evenly moist but not soggy.
- Dilute fertilizer – Use a half-strength liquid fertilizer and avoid overfeeding. Flush the soil occasionally to remove excess salts.
Pest Infestations
Common Pests:
- Spider mites – Tiny pests that create fine webbing on leaves.
- Aphids – Small, green or black insects that suck plant sap.
- Mealybugs – White, cotton-like pests that cluster on stems and leaves.
- Scale – Small, brown, shell-like insects that attach to the stems and undersides of leaves.
Solutions:
- Wipe leaves – Clean the leaves with a damp cloth to remove dust and pests.
- Use insecticidal soap or neem oil – Apply regularly to affected areas to kill pests and prevent reinfestation.
- Keep the plant clean – Inspect leaves often and remove pests immediately before they spread.
Is Dieffenbachia Toxic?
Yes, Dieffenbachia is toxic to humans and pets due to calcium oxalate crystals in its sap.
Symptoms of Poisoning
- Mouth and throat irritation
- Swelling and difficulty swallowing
- Excessive drooling (in pets)
How to Handle Safely
- Wear gloves when pruning or propagating.
- Keep out of reach of children and pets.
Benefits of Growing Dieffenbachia
- Air Purification: Helps remove toxins from the air.
- Aesthetic Appeal: Adds a tropical touch to indoor spaces.
- Easy Care: Ideal for beginners with minimal maintenance needs.
Final Thoughts
Dieffenbachia is a beautiful, low-maintenance plant that can thrive indoors with the right care. By providing proper light, water, humidity, and occasional fertilization, you can enjoy a lush and vibrant Dieffenbachia for years to come. Keep an eye out for common issues and address them promptly to maintain a healthy plant. Happy growing!