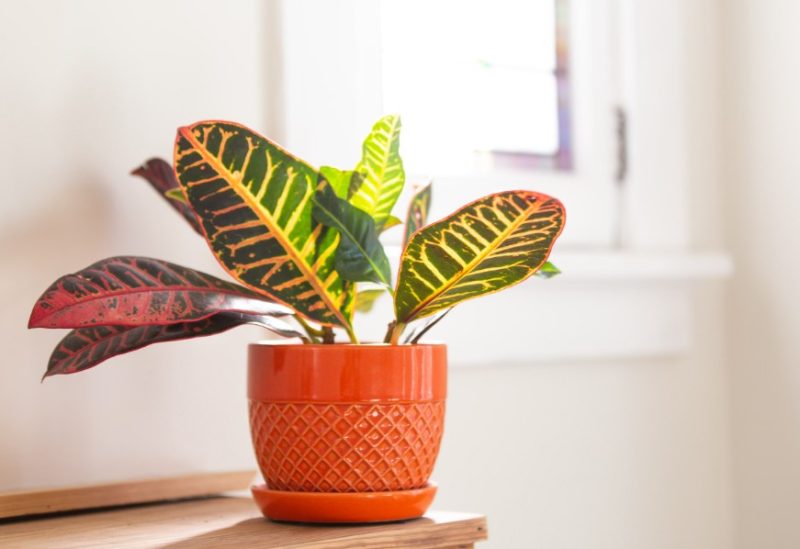
Croton plants (Codiaeum variegatum) are popular for their stunning, colorful foliage and ability to brighten up any indoor or outdoor space. These tropical plants are known for their striking leaves, which come in shades of yellow, orange, red, and green. Proper care ensures a healthy and vibrant croton that thrives for years.
This comprehensive guide will provide you with everything you need to know about Croton plant care, including essential tips on growing conditions, watering, fertilization, propagation, and troubleshooting common issues.
Croton Plant Overview
Croton plants originate from the tropical regions of Southeast Asia and the Pacific Islands. They are commonly grown as houseplants but can also be cultivated outdoors in warm climates. Their dramatic leaves make them an eye-catching addition to any garden or home.
Characteristics of Croton Plants
- Botanical Name: Codiaeum variegatum
- Common Names: Croton, garden croton
- Plant Type: Evergreen shrub
- Mature Size: 3 to 8 feet tall, 3 to 6 feet wide
- Sun Exposure: Bright, indirect light to full sun
- Soil Type: Well-draining, rich soil
- Soil pH: Slightly acidic to neutral (6.0-7.0)
- Hardiness Zones: USDA 9-12
- Toxicity: Toxic to pets and humans if ingested
Croton Plant Growing Conditions
Light Requirements
Crotons require bright, indirect light to maintain their vibrant colors. If grown indoors, place them near a south- or west-facing window where they can receive ample light without direct exposure to harsh midday sun. If light conditions are too low, crotons may lose their signature variegation and turn predominantly green. On the other hand, too much direct sunlight, especially during the peak hours of the day, can cause leaf scorching and discoloration. If growing outdoors, choose a partially shaded spot that receives filtered sunlight for the best foliage display.
Temperature and Humidity
Crotons thrive in warm temperatures ranging from 60-85°F (16-29°C). They are extremely sensitive to cold and should never be exposed to temperatures below 50°F (10°C), as this can lead to leaf drop and overall plant stress. Sudden temperature fluctuations, such as cold drafts from air conditioning or heating vents, can also negatively impact their health.
Humidity is another crucial factor for crotons. These tropical plants prefer high humidity levels between 40-80%. In dry indoor environments, misting the leaves regularly, placing a humidity tray with pebbles and water, or using a humidifier can help maintain the necessary moisture levels. Without adequate humidity, crotons may develop dry, crispy leaf edges and lose their vibrancy.
Soil Requirements
A well-draining, nutrient-rich soil mix is essential for crotons to prevent root rot and promote healthy growth. A potting mix composed of peat moss, perlite, and compost or organic matter provides the right balance of aeration and moisture retention. Adding coarse sand or orchid bark can further improve drainage, preventing excess water from accumulating around the roots. The soil should remain consistently moist but never soggy. Using a slightly acidic to neutral pH range of 6.0 to 7.0 ensures optimal nutrient absorption for vibrant foliage.
How to Plant Croton
Planting in Pots
Growing crotons in pots is a great option for indoor settings or patios, allowing better control over their environment. Here’s how to plant them properly:
- Choose the Right Pot – Select a container with drainage holes to prevent excess water from accumulating and causing root rot. A pot that is slightly larger than the root ball will allow room for growth without holding too much moisture.
- Prepare the Soil – Fill the pot with a well-draining soil mix consisting of potting soil, peat moss, and perlite or coarse sand. This mixture ensures proper aeration and moisture retention.
- Position the Plant – Place the croton in the center of the pot, ensuring the root ball sits at the same depth as it was in its previous container. Avoid burying the stem too deep.
- Backfill and Firm the Soil – Gently fill in the remaining space with soil, pressing lightly to remove air pockets while keeping the roots intact.
- Water Thoroughly – After planting, water deeply until excess moisture drains from the bottom of the pot. This helps settle the soil around the roots.
- Provide Proper Light – Position the potted croton in bright, indirect light near a south- or west-facing window. If outdoors, place it in a partially shaded area with some filtered sunlight.
Planting in the Garden
For those in warm climates, crotons make excellent landscape plants, adding a tropical touch to gardens. Follow these steps for successful planting:
- Select the Right Location – Choose a bright, indirect sunlight or partially shaded spot. Too much direct sunlight can scorch the leaves, while too much shade can lead to dull coloration.
- Prepare the Planting Site – Dig a hole twice the size of the root ball, ensuring ample space for root expansion. Loosen the surrounding soil to improve aeration and drainage.
- Position the Croton – Carefully place the croton in the hole, ensuring it sits at the same depth as it did in its nursery pot. Positioning it too deep can lead to stem rot.
- Backfill with Soil – Gently fill the hole with the excavated soil, pressing lightly to remove air pockets while keeping the plant stable.
- Water Thoroughly – After planting, provide a deep watering to help the roots establish. Ensure the soil remains moist but not soggy in the first few weeks.
- Mulch for Moisture Retention – Apply a layer of mulch (such as bark or compost) around the base of the plant to help retain moisture, regulate soil temperature, and suppress weeds. Keep the mulch a few inches away from the stem to prevent rot.
With the right planting techniques, crotons will establish well and reward you with their striking foliage.
Croton Plant Care
Watering Needs
Crotons require consistent moisture but should never be left in waterlogged soil, as this can lead to root rot. The best practice is to water the plant when the top 1-2 inches of soil feel dry to the touch. During the growing season in spring and summer, crotons may need watering once or twice a week, depending on environmental conditions. In winter, when growth slows, reduce watering frequency to prevent excessive moisture retention in the soil. Using lukewarm, filtered water can help prevent shock, especially if your tap water contains high levels of chlorine or fluoride.
Fertilization
To support healthy foliage and vibrant colors, crotons benefit from regular feeding with a balanced liquid fertilizer diluted to half strength. Apply fertilizer every 4-6 weeks during the active growing season in spring and summer. A fertilizer with a balanced ratio, such as 10-10-10 or 20-20-20, provides essential nutrients without overwhelming the plant. In fall and winter, reduce or stop fertilization since the plant’s growth naturally slows during this period. Over-fertilizing can lead to salt buildup in the soil, which may cause leaf burn or other issues. Flushing the soil with plain water every few months can help prevent nutrient imbalances.
Pruning and Maintenance
Pruning is essential for maintaining the croton’s shape and encouraging bushier growth. Trim back leggy stems using clean, sharp pruning shears, making cuts just above a leaf node to promote new growth. Removing dead, damaged, or yellowing leaves improves the plant’s appearance and prevents potential pest or disease problems.
Beyond pruning, regular leaf maintenance is beneficial. Dust can accumulate on croton leaves, reducing their ability to photosynthesize efficiently. Wipe the leaves with a damp cloth or lightly mist them to keep them clean and healthy. Avoid using leaf shine products, as they can clog the plant’s natural pores. With proper pruning and maintenance, crotons will remain lush and vibrant throughout the year.
Propagation Methods
Propagating from Stem Cuttings
The most effective way to propagate crotons is through stem cuttings, which allow for faster growth and better success rates. To begin, select a healthy, mature croton plant and use clean, sharp pruning shears to cut a 4-6 inch stem that has at least three leaves. The cutting should be taken from a non-woody section of the stem, preferably during the growing season in spring or early summer when the plant is actively producing new growth.
Once the stem cutting is prepared, dip the cut end into a rooting hormone to encourage faster root development and improve success rates. Using a rooting hormone is especially helpful since crotons can sometimes be slow to establish new roots. After applying the hormone, plant the cutting in a small pot filled with moist, well-draining soil. A mix of peat moss and perlite or a standard potting mix works well for root establishment.
To create an ideal humid environment, cover the pot with a clear plastic bag or a humidity dome. This helps retain moisture and mimics the tropical conditions crotons thrive in. Place the cutting in a warm location with bright, indirect light, avoiding direct sunlight that could dry out the delicate cutting. The soil should remain consistently moist but not soggy. After 4-6 weeks, roots should begin to develop. Once new growth appears, the plant can be gradually acclimated to normal growing conditions before being transplanted into a larger pot or outdoor garden.
Common Croton Problems and Solutions
Leaf Drop
One of the most common issues with crotons is leaf drop, which can occur due to sudden temperature changes, overwatering, or underwatering. Crotons are highly sensitive to environmental fluctuations, and exposure to cold drafts, air conditioning vents, or abrupt relocations can cause stress, leading to leaf loss. Overwatering can suffocate the roots, while underwatering can dry out the plant, both resulting in leaf drop.
To prevent this, maintain a consistent temperature range between 60-85°F (16-29°C) and avoid placing the plant near cold drafts or direct heat sources. Keep the soil evenly moist but not soggy, allowing the top 1-2 inches to dry out before watering again. If a croton has already lost leaves, improve care conditions, and new growth should emerge over time.
Pests
Crotons can attract common houseplant pests such as spider mites, mealybugs, and scale insects. Spider mites appear as tiny specks and create fine webbing on the undersides of leaves, while mealybugs look like small white cotton-like clusters. Scale insects appear as brown or waxy bumps along the stems and leaves. These pests feed on plant sap, leading to weakened, discolored, or curling leaves.
To control infestations, regularly inspect leaves and stems for signs of pests. Wipe affected areas with a cotton swab dipped in rubbing alcohol or use insecticidal soap and neem oil to eliminate them. Increasing humidity levels can also help prevent spider mites, as they thrive in dry conditions. For severe infestations, pruning the affected areas and applying repeated treatments may be necessary.
Fungal and Bacterial Issues
Crotons are susceptible to fungal and bacterial diseases such as leaf spots and root rot. Leaf spots appear as dark brown or black lesions on foliage, often caused by excessive moisture on leaves or poor air circulation. Root rot, a more serious issue, occurs when the roots sit in waterlogged soil, leading to mushy, decayed roots and wilting leaves.
To prevent fungal and bacterial infections, avoid overhead watering and ensure good airflow around the plant. Water at the base rather than on the leaves, and always use well-draining soil to prevent excess moisture. If root rot is detected, remove the affected roots, repot the plant in fresh soil, and adjust watering habits to keep the soil slightly moist but not overly saturated. Proper care and attention will keep crotons healthy and thriving.
Conclusion
Croton plants are a stunning addition to any home or garden, provided they receive proper care. By maintaining the right light, temperature, humidity, and watering schedule, you can enjoy the vibrant colors of crotons year-round. With the right attention, these tropical beauties will thrive and become a focal point in any space.