Anaheim pepper, also known as California chili or New Mexico chili, is a popular variety of mild chili pepper. It’s prized for its versatility in the kitchen and its relatively easy growth in the garden. Whether you’re a seasoned gardener or a beginner, learning how to care for and grow Anaheim peppers can be a rewarding experience. This growing guide will walk you through everything you need to know, from planting to harvesting. Let’s dive into the details of Anaheim pepper care!
Understanding Anaheim Pepper
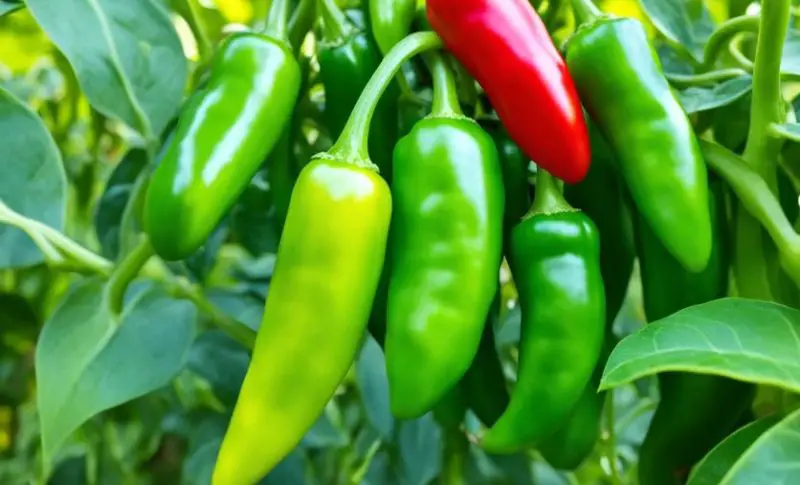
Before you start growing Anaheim peppers, it’s important to understand the characteristics of this plant. The Anaheim pepper is a mild chili that grows best in warm climates. It typically reaches a length of about 6 to 10 inches and matures to a vibrant green, eventually turning red when fully ripe.
These peppers are often used in Mexican and Southwestern cuisines, making them an excellent choice for your garden if you love flavorful yet mild heat in your dishes. They are great for roasting, stuffing, or adding to sauces.
Ideal Growing Conditions for Anaheim Peppers
To ensure a successful harvest, you need to provide the right growing conditions for your Anaheim peppers. Here are the key factors to consider:
Climate and Temperature
Anaheim peppers thrive in warm, sunny climates. The ideal temperature range for growing Anaheim peppers is between 65°F and 85°F (18°C to 29°C). These plants are not frost-tolerant, so it’s important to plant them after the last frost in your area.
If you live in a cooler region, you can start Anaheim pepper seeds indoors and transplant them outside once the weather has warmed up.
Sunlight
Like most peppers, Anaheim peppers need full sunlight for at least 6 to 8 hours a day. Be sure to plant them in a spot that gets plenty of direct sunlight, as this will help them grow strong and produce a good yield.
Soil Requirements
Anaheim peppers prefer well-draining soil with a pH level between 6.2 and 7.0. The soil should be rich in organic matter, so it’s a good idea to mix in compost before planting.
If you have heavy clay or sandy soil, consider amending it with organic material to improve its structure and nutrient content.
Planting Anaheim Peppers
Once you’ve prepared your garden bed, it’s time to plant your Anaheim peppers. Here’s a step-by-step guide to help you get started:
Starting From Seeds
Anaheim peppers can be grown from seeds or transplants. If you’re starting from seeds, sow them indoors about 6 to 8 weeks before the last expected frost. Use seed trays or small pots filled with a good quality seed-starting mix.
Place the seeds about ¼ inch deep and water them lightly. Keep the soil moist but not soggy, and place the trays in a warm location with temperatures around 70°F to 80°F (21°C to 27°C). Anaheim pepper seeds usually take 7 to 14 days to germinate.
Once the seedlings have grown two sets of true leaves, they are ready for transplanting outdoors.
Transplanting Seedlings
When the outdoor temperature is consistently above 60°F (16°C) and the seedlings are at least 4 to 6 inches tall, you can transplant them into the garden. Space the plants about 18 to 24 inches apart, with rows spaced 24 to 36 inches apart.
Before transplanting, harden off the seedlings by gradually exposing them to outdoor conditions over the course of a week. This will help them adjust to the outdoor environment and reduce transplant shock.
Watering and Fertilizing Anaheim Peppers
Proper watering and fertilization are crucial for healthy Anaheim pepper plants.
Watering
Anaheim peppers need consistent moisture to thrive, but they do not like waterlogged soil. Water the plants deeply once or twice a week, depending on the weather and soil conditions. It’s important to keep the soil evenly moist, especially during flowering and fruiting.
To prevent fungal diseases, water the base of the plants and avoid getting the leaves wet.
Fertilizing
Anaheim peppers are relatively light feeders, but they benefit from regular fertilization. A balanced fertilizer, such as a 10-10-10 or 5-10-10 mix, can be applied once the plants are established. Alternatively, you can use compost or organic fertilizers to provide the nutrients the plants need.
Side-dressing the plants with compost or a nitrogen-rich fertilizer once the peppers start to form will encourage healthy growth and increase your yield.
Pruning and Supporting Anaheim Peppers
Pruning is not strictly necessary for Anaheim peppers, but it can improve air circulation and help the plants focus their energy on producing fruit. Here are some tips for pruning and supporting your Anaheim pepper plants:
Pruning
You can remove any lower leaves or branches that are close to the ground, as these can attract pests and diseases. If the plants become too bushy, you can also trim back some of the excess foliage to allow more light and air to reach the interior of the plant.
Supporting
Anaheim peppers can grow tall and may need support as they begin to bear fruit. You can use stakes, cages, or trellises to keep the plants upright and prevent them from bending or breaking under the weight of the peppers.
Pests and Diseases Affecting Anaheim Peppers
Like all garden plants, Anaheim peppers can be susceptible to pests and diseases. Here’s a list of common problems and how to deal with them:
Common Pests
- Aphids: These small, sap-sucking insects can weaken the plants and spread diseases. You can control aphids by spraying the plants with a strong jet of water or using insecticidal soap.
- Spider mites: These tiny pests can cause yellowing and wilting of the leaves. Regularly inspect your plants and remove any affected leaves. Neem oil or insecticidal soap can also help.
- Pepper weevils: These pests bore into the fruit, causing it to drop prematurely. Remove any damaged fruit and use row covers to protect the plants.
Common Diseases
- Blossom end rot: This is a common problem caused by calcium deficiency and irregular watering. Make sure to keep the soil evenly moist and avoid letting it dry out completely.
- Powdery mildew: This fungal disease can affect peppers in humid conditions. Improve air circulation around the plants by spacing them properly and pruning excess foliage.
- Bacterial spot: This disease causes dark, water-soaked spots on the leaves and fruit. Remove and destroy any affected plants to prevent the spread of the disease.
Harvesting Anaheim Peppers
Anaheim peppers are ready to harvest when they reach their full size and are a glossy green color. You can pick them while they are green or wait for them to ripen to red for a sweeter flavor.
To harvest the peppers, use a pair of scissors or pruners to cut them from the plant, leaving a small portion of the stem attached. Avoid pulling the peppers off the plant, as this can damage the stems and reduce future yields.
Storing and Using Anaheim Peppers
After harvesting your Anaheim peppers, you can store them in the refrigerator for up to a week. For longer storage, you can freeze, dry, or pickle the peppers.
Anaheim peppers are incredibly versatile in the kitchen. You can roast them for a smoky flavor, stuff them with cheese or meat, or use them in salsas, sauces, and stews. Their mild heat makes them a favorite for family-friendly recipes.
Conclusion
Growing Anaheim peppers is a relatively easy and rewarding task for gardeners of all skill levels. By providing the right growing conditions, such as warm temperatures, full sunlight, and well-drained soil, you can ensure a healthy crop of flavorful peppers. Remember to water regularly, fertilize when necessary, and keep an eye out for pests and diseases. With proper care, you’ll enjoy a bountiful harvest of Anaheim peppers that you can use in a variety of delicious dishes.
Follow this Anaheim pepper care and growing guide, and soon enough, you’ll be enjoying the fruits of your labor!


